VISUAL EFFECTS THINGS ARE NOT ALWAYS WHAT THEY SEEM Affordable Special Effects and Realistic Looking Props. These are some of the Special Effects and Props used in productions I have worked on. In one movie we needed a policeman and police car. Since it is illegal to look like the real police in public or to give the impression of being real police we had to be careful. We could ask the police to help us but that would involve getting permits and a lot of red tape. Best to do anything involving Police on private property, out of the view of the public. We didn’t want to go to the expense of painting a car in Police colours. To avoid copyright issues we designed a Police uniform that is different from the real New Zealand Police one. It is the uniform of a fictional police force but looks convincing in the movie. The decals on the car were designed in Photoshop and placed over a green background. When Chroma keyed over the white car they look real. The illusion would be spoiled if someone walked between the car and the camera. This had to be shot on a tripod to avoid any movement of the car. The police badges were made in Photoshop and printed onto iron on transfers. They were then ironed onto white cotton cloth, cut out and stuck onto a blue shirt. In the scene of the school building, a brick wall was created in Photoshop over a green background. Again everything was shot from a tripod. The girls walked toward camera but the scene had to be cut before they reached the wall. For the hospital scene it was thought better to create our own hospital room rather than try to get permission to use a real one. The equipment on the wall had to be very light so it could be attached with double sided tape and removed again without leaving any marks. It was made of cardboard, small plastic bottles and bottle caps and printed labels. Again the labels including the dials on the instruments were printed in Photoshop. |
||||
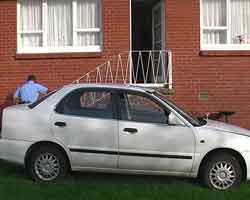 In one of my movies we needed a Police car. This is moving video and the Policeman runs up the steps. A tripod had to be used so there would be no movement of the car.
 For the movie What Goes Around we needed a school setting. In this scene the school girls are walking toward the school building.
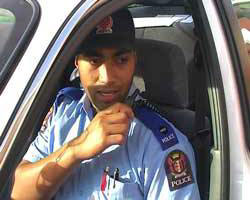 Here is our policeman. Most people would not notice his badge and uniform are not the same as the New Zealand Police wear. This is the uniform of a fictional police force.
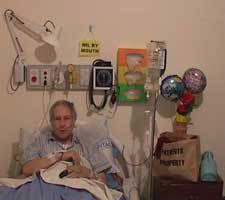 If you think this was taken when I was in hospital you are wrong. These props were made for a production that required a hospital scene. Everything had to be light enough to hang on a wall using removeble 3M Command Strips so that the wall would not be marked.
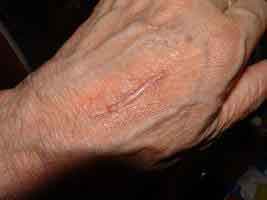 This is an old scar that has not healed properly. It is made using liquid latex in a squeeze bottle. It is squeezed out and allowed to dry. When dry it is covered with make-up. If a scab is needed, colour it with dark red make-up. The scar does not need to be made directly on the actor’s skin. It can be prepared beforehand on wax paper. When needed it is peeled off the wax paper and a little liquid latex is used to glue it to the actor.
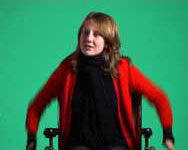 Here is a Chroma Key exercise we did at the club. The girl is in a wheelchair in front of a green background.
|
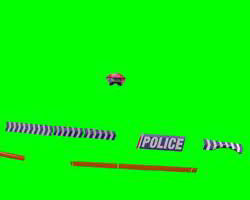 This is the artwork for the Police car. This was created in Photoshop. The green becomes transparent when this artwork is chroma keyed over the video of the car.
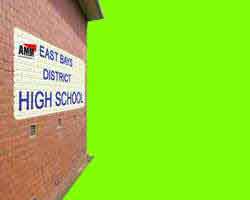 This is the school wall created in Photoshop. Once again the green becomes transparent when keyed over the original video.
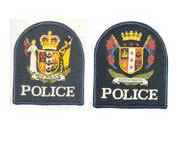 On the left is the real New Zealand Police badge. On the right is my design. This was created in Photoshop and printed onto iron on transfers. Then ironed onto white cloth.
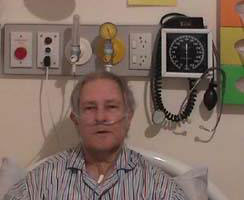 Everything was made from cardboard and plastic jars and bottle tops. The dials, labels and switch panels were all made in Photoshop and printed on light card or sticky labels. Even the lamp was made of cardboard, plastic strips and a disposable plastic cup and plate.
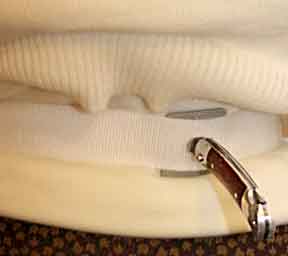
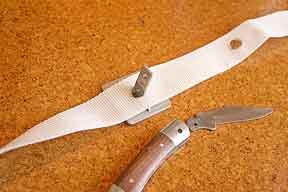
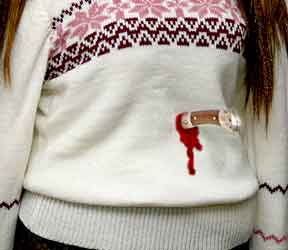 Stabbing victim. Under the costume she wears a belt with a fabricated metal buckle. The buckle has a metal tag that sticks out through the garment. The knife blade is removed from the handle and the handle is screwed onto the tag. Then fake blood is applied.
 Here she is keyed over video shot while travelling along the motorway. The girl has to go very fast to avoid being run over by the truck.
|
 This is the end result. The Policeman gets out of the car and runs up the steps. The scene starts just after he gets out to ensure there is no movement of the car.
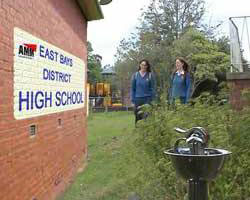 The completed scene. This also had to be shot from a tripod. The only movement is the two girls walking toward the camera. .
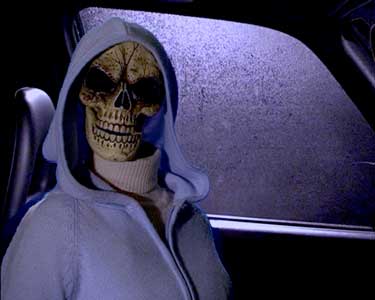
This is a prop used in the movie "The Long Drive Home". The skull is hidden by the hood. Then the head has to turn until the skull is revealed. This could have been done by remote control but it has been found to be more effective using the stop motion feature of Premiere Elements. 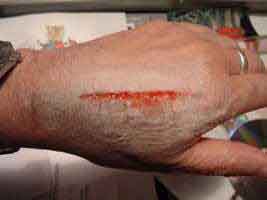 In one production we needed to show wounds and scars. This is how makeup is done for a fresh cut. Two pieces of tissue are torn, folded and stuck down with liquid latex. The tissue is torn so it blends in with the real skin. The folded edges are put together with a slight gap. The gap is filled with fake blood. The tissue needs to be covered with make-up to match the skin.
©2006-2009 Ron H Bannister. All photos copyright and must not be reproduced without permission. |
||

|